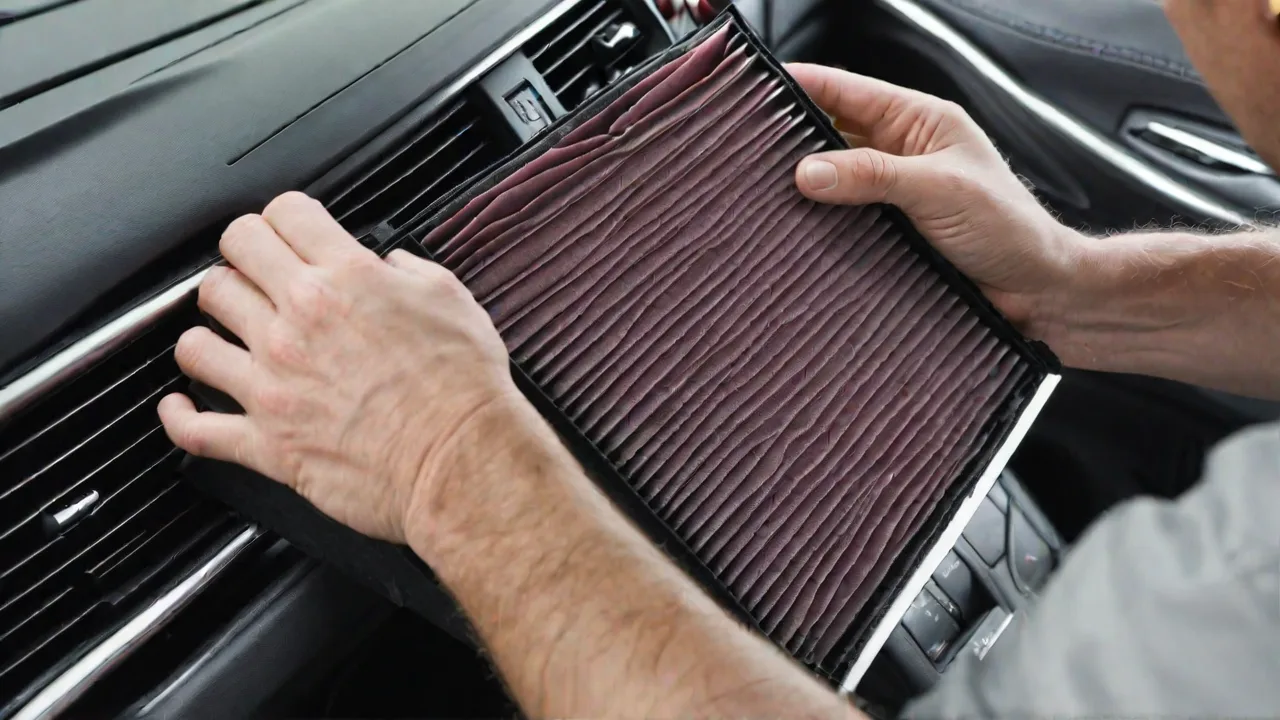
Step-by-Step Guide to Replacing Cabin Air Filters on the Acura MDX
Maintaining the cabin air filter in your Acura MDX is an essential part of vehicle upkeep that greatly contributes to the comfort and health of everyone inside the car. The cabin air filter acts as a barrier, trapping dust, pollen, mold spores, and other airborne contaminants before they can enter the vehicle’s interior through the heating, ventilation, and air conditioning (HVAC) system. Over time, the filter becomes clogged with debris and loses effectiveness, reducing airflow and forcing the HVAC system to work harder. This can lead to unpleasant odors, decreased air quality, and potentially costly repairs if left unattended.
Fortunately, replacing the cabin air filter in the Acura MDX is a straightforward process that can be completed with minimal tools and basic mechanical know-how. This comprehensive guide will walk you through everything you need to know—from understanding when to replace your filter, choosing the right replacement, to a detailed, step-by-step walkthrough of the replacement procedure. By following these instructions, you can ensure your vehicle’s cabin air remains fresh and your HVAC system functions optimally.
Understanding the Cabin Air Filter and Its Importance
The cabin air filter is designed to clean the air entering the interior of your Acura MDX, filtering out contaminants such as dust, pollen, allergens, exhaust fumes, and even bacteria. This is especially important for drivers and passengers who suffer from allergies or respiratory conditions. A clean filter promotes better air circulation, prevents unpleasant odors, and helps maintain a comfortable environment inside the vehicle.
In addition to improving air quality, a clean cabin air filter helps your HVAC system operate more efficiently. A clogged filter restricts airflow, causing the system to work harder to push air through, which can lead to increased wear and higher energy consumption. Regular replacement of the cabin air filter helps extend the life of your HVAC components and can save you money on repairs and fuel in the long run.
When to Replace the Cabin Air Filter on Your Acura MDX
Most Acura MDX models recommend replacing the cabin air filter approximately every 15,000 to 20,000 miles or about once a year under normal driving conditions. However, this interval can vary depending on several factors:
- Driving environment: If you frequently drive in dusty, polluted, or heavily urbanized areas, your cabin air filter will accumulate debris more quickly and may require more frequent replacement.
- Seasonal conditions: During pollen season or in regions with heavy smog or wildfire smoke, replacing the filter more often can help maintain air quality inside the cabin.
- Signs of a clogged filter: Noticeable reduction in airflow, unpleasant odors, increased dust inside the vehicle, or persistent fogging of windows can all indicate it’s time to replace the cabin air filter.
Consult your Acura MDX owner’s manual for the manufacturer’s specific maintenance recommendations, but also pay attention to the conditions in which you drive and your personal comfort needs.
Choosing the Right Replacement Cabin Air Filter
When it’s time to replace your cabin air filter, it’s important to select a filter that fits your Acura MDX model year and trim. Filters vary in size and filtration technology, so purchasing an OEM (Original Equipment Manufacturer) filter or a high-quality aftermarket equivalent ensures proper fit and performance.
There are generally two main types of cabin air filters available:
- Particle filters: These are standard filters that trap dust, pollen, and other particulate matter.
- Activated carbon filters: These include a layer of activated carbon to absorb odors, gases, and some harmful pollutants in addition to trapping particles. They are highly recommended for drivers concerned about air quality.
Consider your local air quality and personal preferences when choosing between these options. For example, if you live in an area with heavy traffic pollution or smoke, an activated carbon filter may provide better protection.
Tools and Materials Needed for Replacement
Replacing the cabin air filter on the Acura MDX requires only a few basic tools and materials, many of which you may already have at home. Here’s what you’ll need:
- Replacement cabin air filter: Ensure it is compatible with your specific Acura MDX model year.
- Flathead screwdriver: Some models may require this to release clips or remove screws holding the filter cover or glove box in place.
- Clean cloth or microfiber towel: Useful for wiping out any dust or debris inside the filter housing.
- Optional: vacuum cleaner with a narrow nozzle attachment: Helpful for removing loose dirt and debris from the compartment.
Step-by-Step Guide to Replacing the Cabin Air Filter on the Acura MDX
Step 1: Prepare Your Vehicle
Park your Acura MDX on a flat surface, engage the parking brake, and turn off the ignition. Open the passenger side door to access the glove box. For best results, perform this maintenance in a well-lit area or use a flashlight to clearly see the filter compartment.
Step 2: Empty and Lower the Glove Box
Remove all items from the glove box to avoid damage or loss during the process. Depending on your model year, the glove box may be held in place by side stops or a limiting arm:
- Release side stops: Gently press the sides of the glove box inward to free it from the stops, allowing it to swing downward.
- Detach the limiting arm: Some models have a small plastic arm connected to the glove box to control its opening. Carefully unclip or detach this arm to fully lower the glove box.
Lower the glove box until you have clear access to the cabin air filter compartment behind it.
Step 3: Locate and Remove the Cabin Air Filter Cover
The cabin air filter is housed behind a rectangular or square plastic cover mounted to the HVAC system. The cover is usually secured with clips or screws:
- If clips hold the cover, gently press or pry them open with your fingers or a flathead screwdriver.
- If screws secure the cover, use the screwdriver to remove them carefully.
Once free, remove the cover to expose the cabin air filter.
Step 4: Remove the Old Cabin Air Filter
Carefully slide out the old cabin air filter. Be gentle to avoid releasing trapped dust and debris into the vehicle interior. Take note of the filter’s orientation, paying special attention to any airflow direction arrows printed on the filter frame.
Step 5: Clean the Filter Housing
Before inserting the new filter, inspect the filter housing for accumulated dust, leaves, or debris. Use a clean cloth or vacuum cleaner to remove any contaminants. This ensures optimal airflow and prevents premature clogging of your new filter.
Step 6: Install the New Cabin Air Filter
Take your new cabin air filter and align it according to the airflow direction arrows printed on the filter frame. The arrows should point in the direction of air movement—usually downward or toward the rear of the vehicle. Insert the filter smoothly into the housing, ensuring it fits snugly without forcing.
Step 7: Reassemble the Components
Replace the filter cover and secure it with clips or screws as originally installed. Slowly lift the glove box back into position, making sure the side stops or limiting arm re-engage properly. Double-check that the glove box opens and closes smoothly.
Step 8: Test the HVAC System
Start your Acura MDX and turn on the air conditioning or heating system. Verify that airflow is strong and consistent through the vents. If you notice any unusual noises or restricted airflow, double-check that the filter is correctly installed and the cover is properly secured.
Additional Tips for Maintaining Your Acura MDX’s Cabin Air Quality
- Change filters regularly: Adhering to the recommended replacement schedule helps maintain optimal air quality and system performance.
- Keep the interior clean: Regular vacuuming and wiping down surfaces reduces dust and allergen buildup inside the cabin.
- Use recirculation mode selectively: Using the air recirculation mode on your HVAC system can help reduce the intake of outside pollutants, especially in heavy traffic or polluted environments.
- Inspect for mold or mildew: If you detect musty odors, have your HVAC system inspected for mold growth, which can sometimes occur in the evaporator or ductwork and require professional cleaning.
- Check the cabin air filter before long trips: Replacing the filter prior to extended travel helps ensure the freshest air during your journey.
When to Seek Professional Assistance
While replacing the cabin air filter is generally a simple DIY task, there are situations where professional service may be advisable:
- If you encounter difficulty accessing the filter compartment due to vehicle design variations or modifications.
- If you notice persistent odors, fogging, or poor HVAC performance after filter replacement, which may indicate deeper issues such as mold in the HVAC system or mechanical faults.
- If you prefer to have your Acura MDX inspected thoroughly during scheduled maintenance intervals, including cabin air filter replacement.
Professional technicians have specialized tools and knowledge to diagnose and resolve HVAC-related problems beyond routine filter replacement.
Conclusion
Replacing the cabin air filter on your Acura MDX is a cost-effective way to maintain a clean and comfortable interior environment, protect your HVAC system, and improve overall air quality. By following this step-by-step guide, you can perform this maintenance yourself in less than 30 minutes, saving money and gaining the satisfaction of caring for your vehicle.
Regular attention to your cabin air filter, combined with mindful driving habits and interior upkeep, ensures that your Acura MDX remains a pleasant and healthy place for you and your passengers, mile after mile.